From job seekers to business owners, everyone needs a professional-looking business headshot to use online.
But if you don’t have the money or are too shy to hire a photographer, here’s how to take a great business headshot photo by yourself at home.
We especially love this method because you can use it again and again whenever you want a different look.
Step 1: Find a plain wall across from a window

For an at-home headshot that looks like you hired a professional, make sure any identifying features of your house — window blinds, kitchen cabinets, couches, etc. — are out of the shot. You want to mimic the look of a photographer’s studio.
Find a plain wall in your house that’s directly facing a window during a time of day in which the sun is not in immediate view. The soft, diffused light from the window is extremely flattering and will make the picture look professionally-taken.
(See: How Lighting Changes What You Look Like)
Pro tip: you want to stand far enough away from the wall that you don’t have a clearly-defined shadow.
Step 2: Set up a tripod to hold your smartphone

This is the part where I warn you about extended-arm selfies. Selfies distort the proportions of your face, making your forehead or nose look larger than it is. This subtle effect tells people that your photo is a selfie even if your arm isn’t in the shot.
(See: Why Selfies Make Your Face Look Bad)
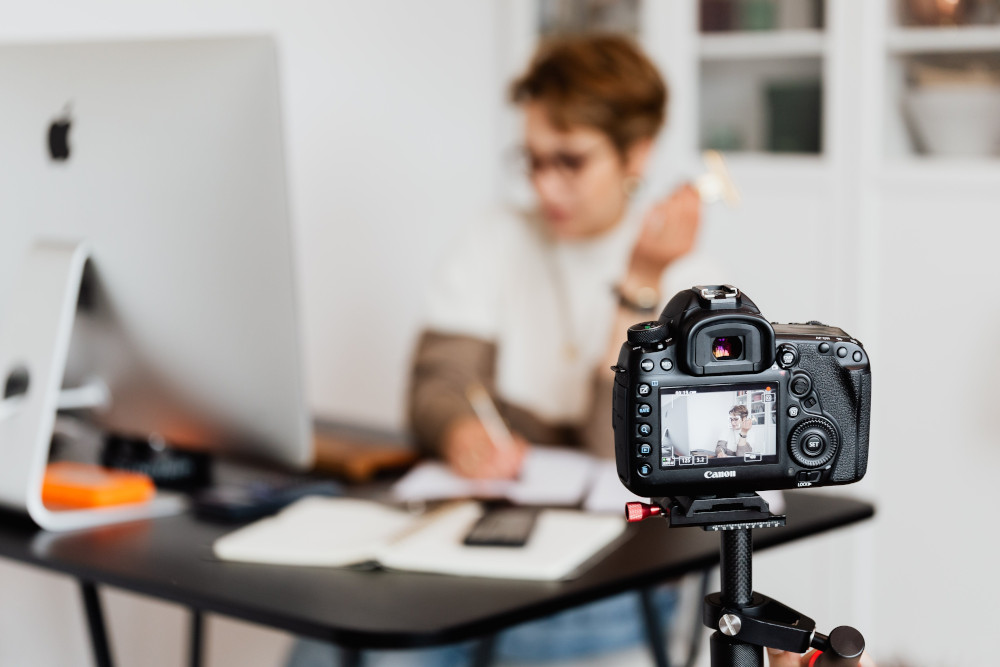
To keep today’s pictures from looking like selfies, we’re going to use a tripod. The trick is to get your camera a few feet away from you at about eye level.
We’re using this cheap tripod from Amazon. It requires a separate adapter to hold an iPhone. (The 2 pieces are shown here, albeit without the iPhone on it.)
If you don’t want to buy a tripod, a table stacked with books and/or a Kleenex box might work as long as they don’t block the light.
Step 3: Use your timer to take pictures
Once you’ve got your phone in place, turn on your camera’s timer setting.
If you’re using an iPhone, you’ll simply open up your camera app and tap the clock icon:
![]()
![]()
Once your timer is set, you simply press the button to take a picture, and it gives you a few seconds to get in place. Easy!
With your setup down-pat, go ahead and take lots of photos to ensure you’ve got a few good shots in the bunch. Experiment with different outfits, accessories, poses, expressions, and angles.
Step 4: Edit your favorites
If you followed the steps above, you should have a whole bunch of pictures that look something like this.
Notice how he’s a few steps away from both the wall and the camera. That few feet of spacing makes this look awesome!
Now, once you’ve uploaded the shots to your computer (by plugging your phone into your computer or using your Dropbox app or what have you), you’ll want to use a free photo editor to make some easy tweaks.
For an example, here’s an edited version of the photo above:
Here are the exact edits shown:
- Rotated the picture slightly for better posture
- Cropped to a square
- Edited the color balance to be less yellow
- Applied some blur to the background
- Slightly whitened teeth
All in all, these changes were very quick to make! We suggest you go ahead and edit several different photos to give you some options to work with in the next step.
Step 5: Get feedback to choose the right photo
Finally, you’ll want to take the handful of shots you just edited and put them on Photofeeler for some free, easy feedback.
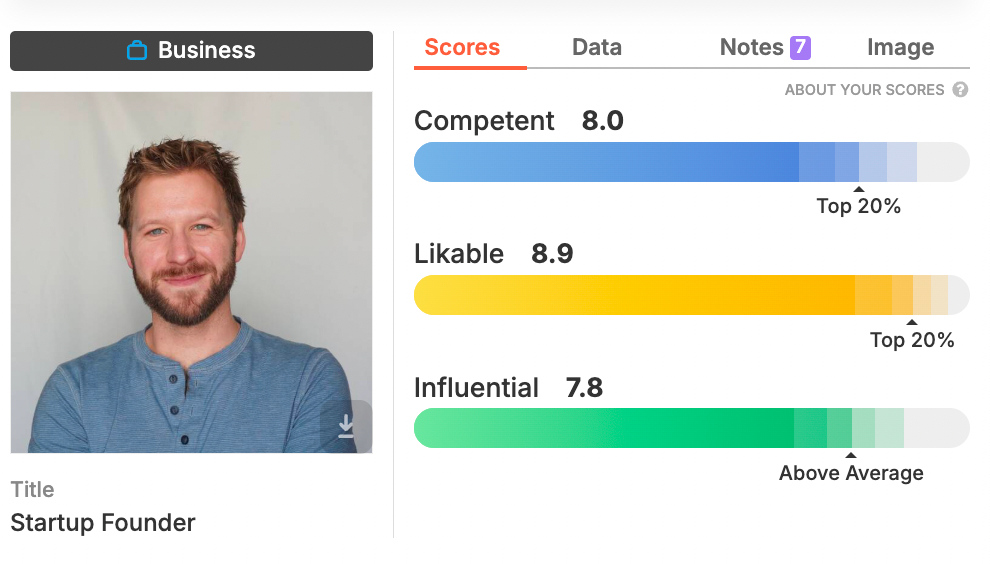
Here are the results for our first picture:
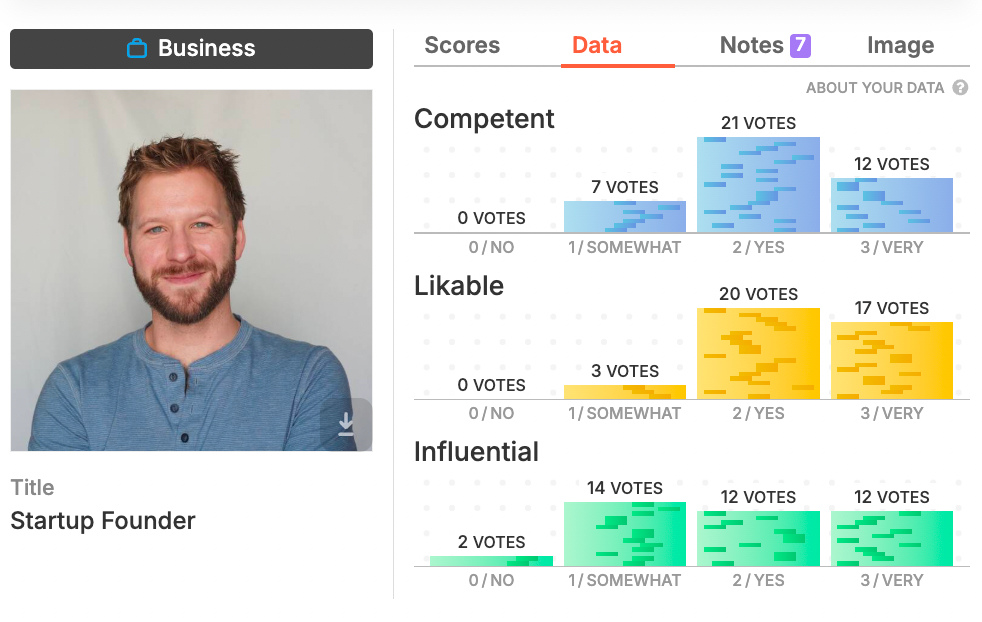
Here are the individual scores it got from each person:
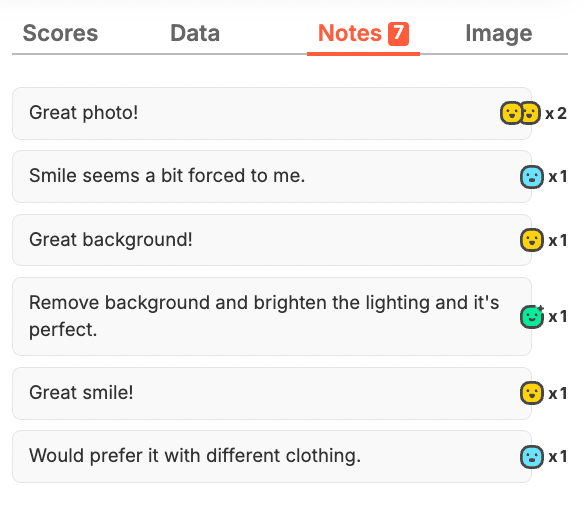
And here are the notes they left:
So, this pic did decently well on Photofeeler!
This would be a hard score to beat, but if we wanted to try some glasses for a more academic vibe or a suit jacket to look more like an executive, it’d be very interesting to see how those changes are perceived.
Anyway, that wraps up all you need to know! We hope you find this method simple enough to use again and again.
As always, if you know someone who could use this info, be sure to spread the word.
